Step 1
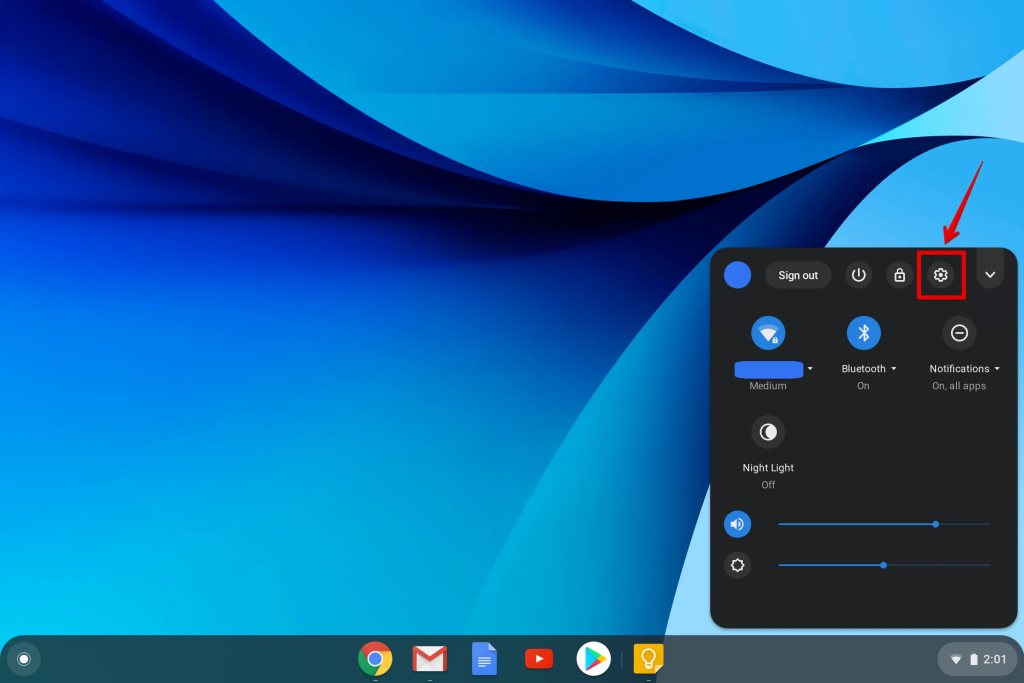
Click on the notification tray, and then press the gear-shaped “Settings” icon.
Step 2
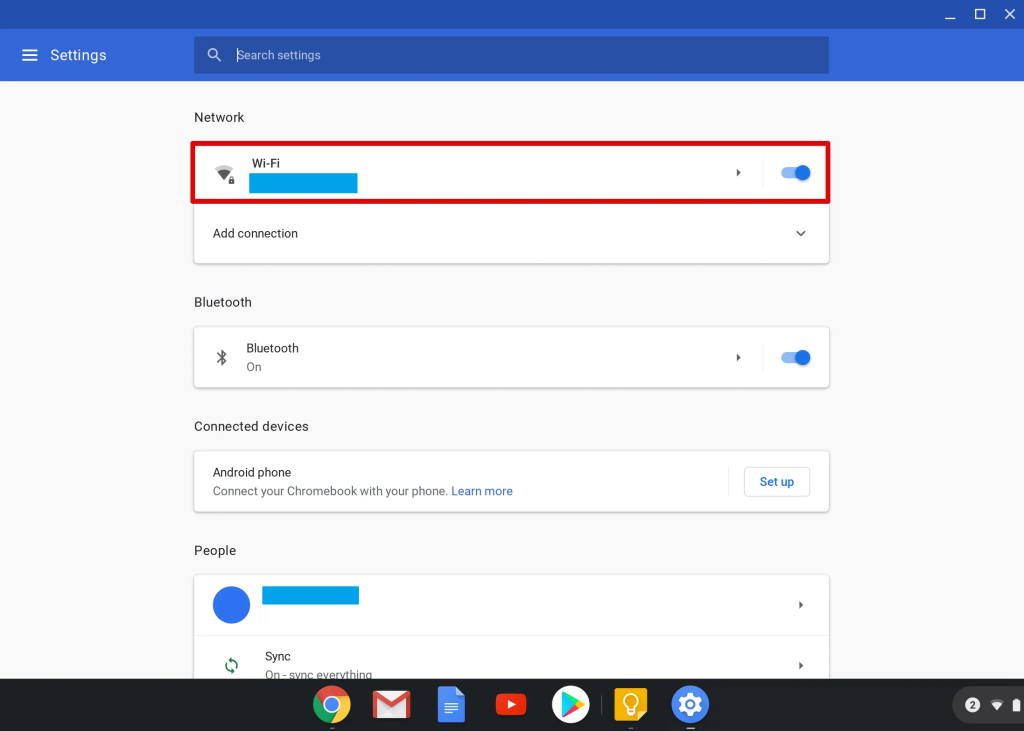
Click on your internet connection.
Step 3
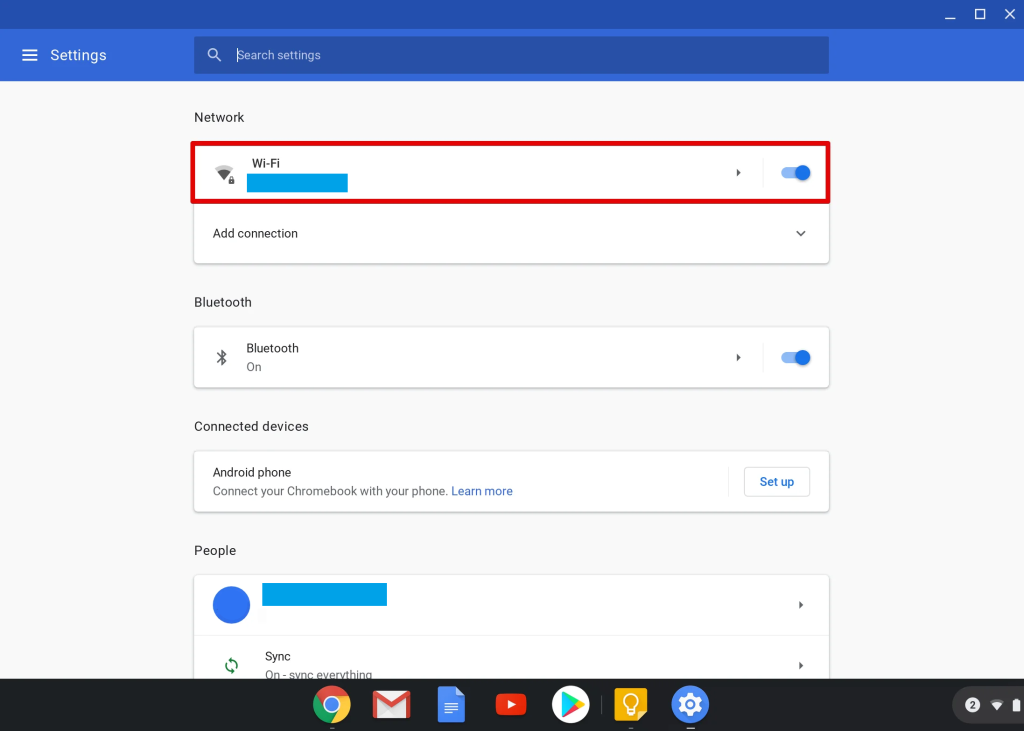
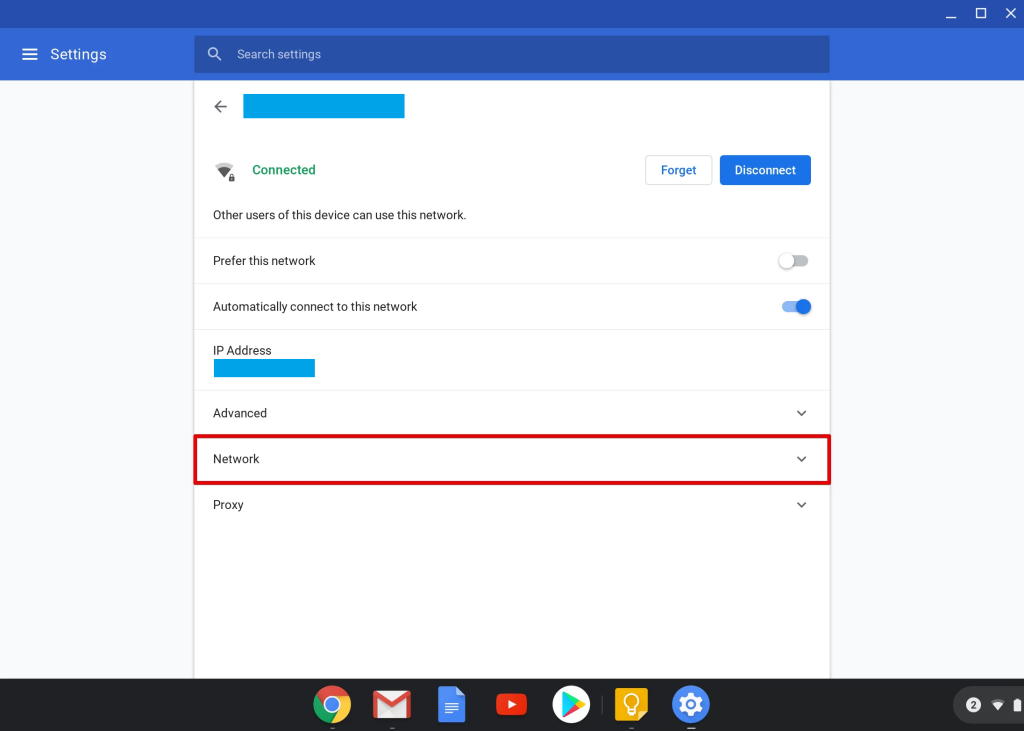
You’ll see the list of networks. Find your network and click on it again. Navigate to “Network”.
Step 4
In the Network section of your Chromebook settings, scroll down and check the box in front of the “Custom name servers” option.
Step 5
Enter the addresses of KeepSolid SmartDNS servers in the Custom name servers fields:
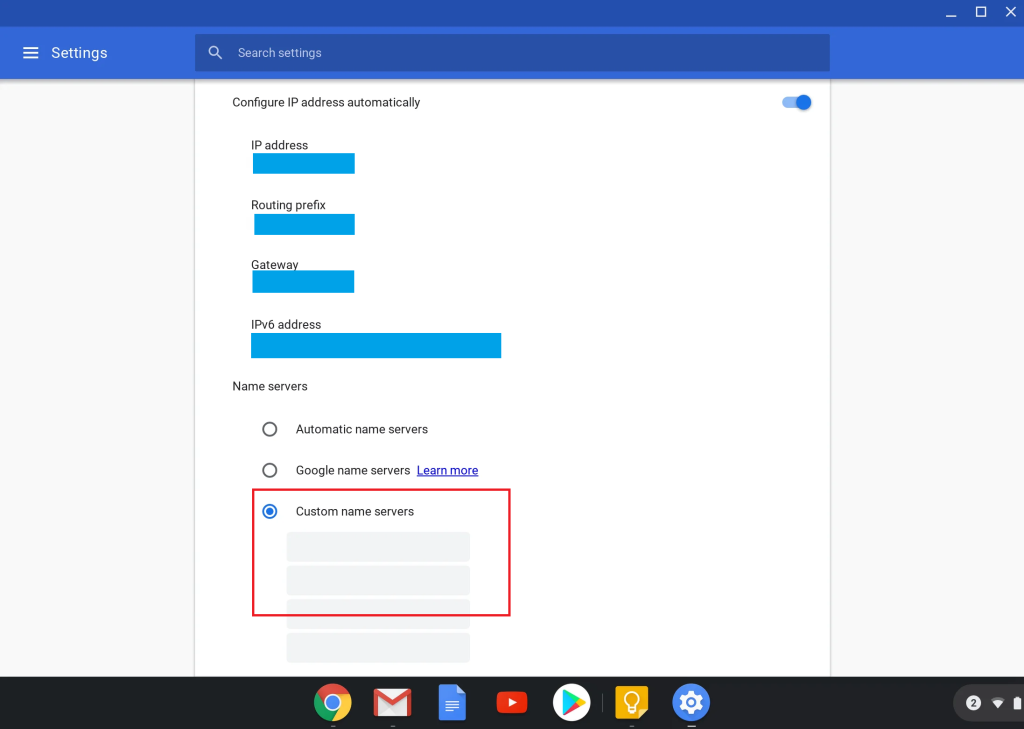
Step 6
Close the settings and reboot your Chromebook device.
You’re done! Here you will find what sites and media channels are unlocked via SmartDNS.

