Step 1
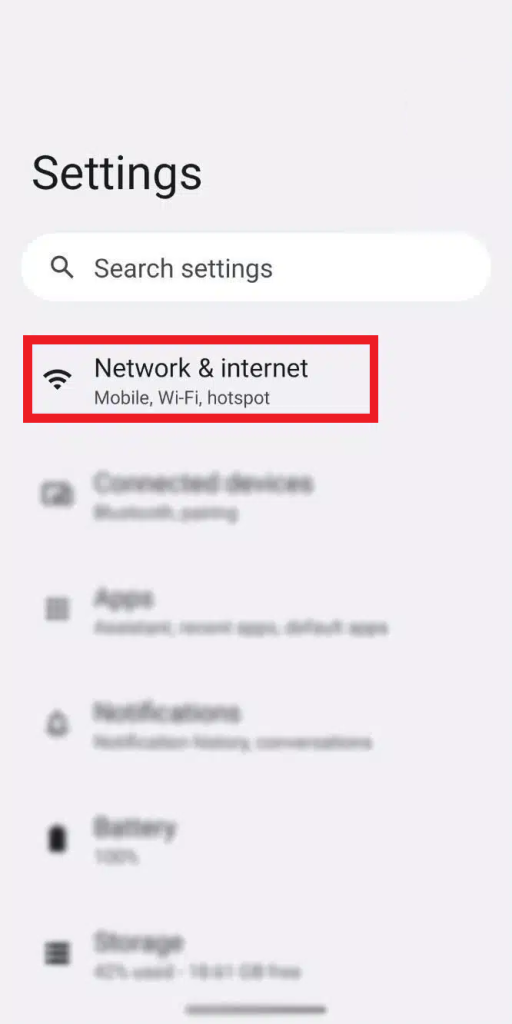
Find Settings and go to “Network & Internet”.
Step 2
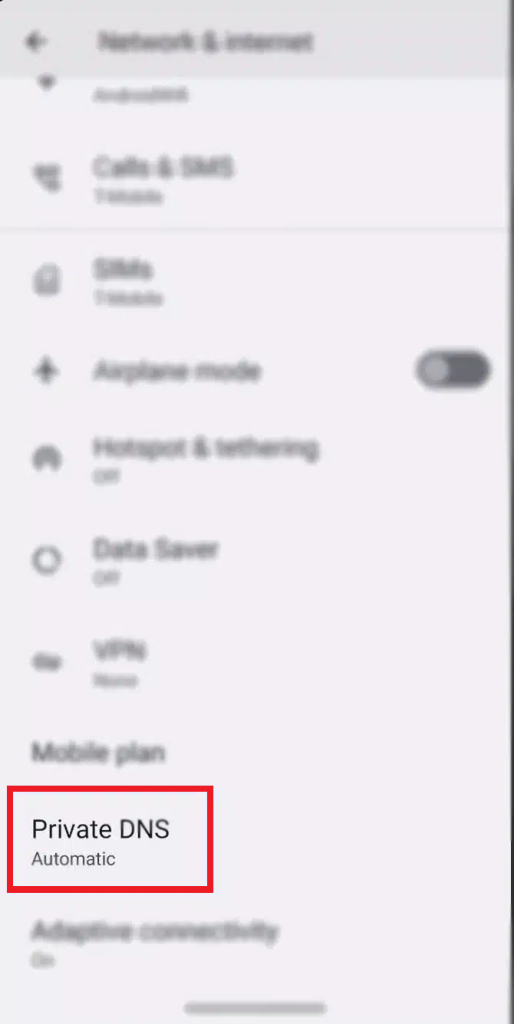
Scroll down and click on “Private DNS”.
Step 3
Make sure “Private DNS” is turned OFF (otherwise, it will override the DNS settings you are using).
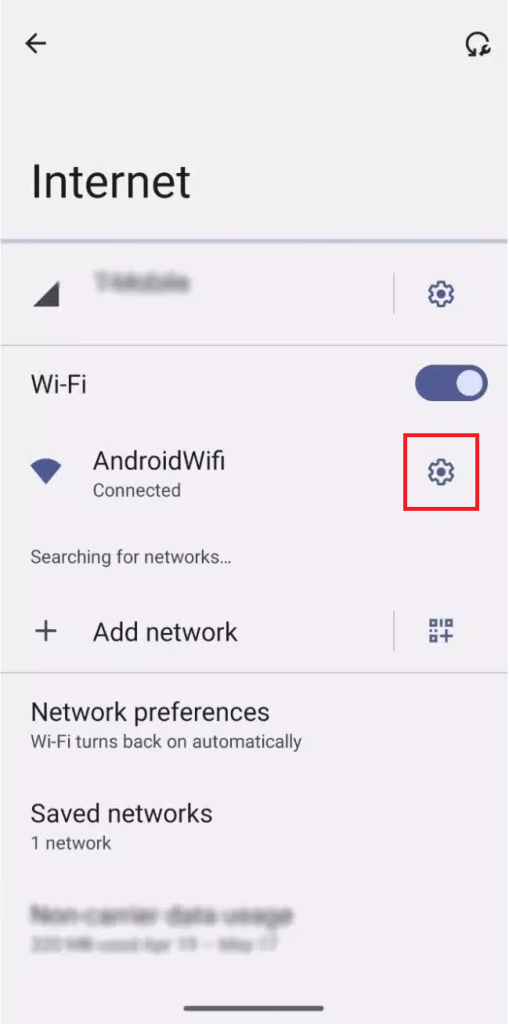
Now, scroll back up and tap on “Internet”. Click on the wheel next to the WiFi network you’re connected to.
Step 4
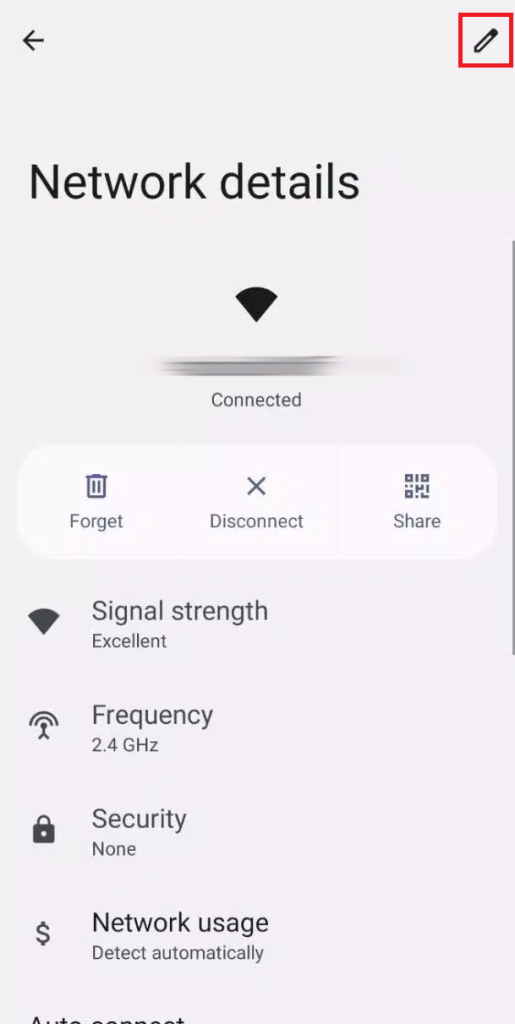
Tap the edit button you can find on the top right corner of your screen.
Step 5
Select “Advanced options” and under “IP settings” choose “Static”.
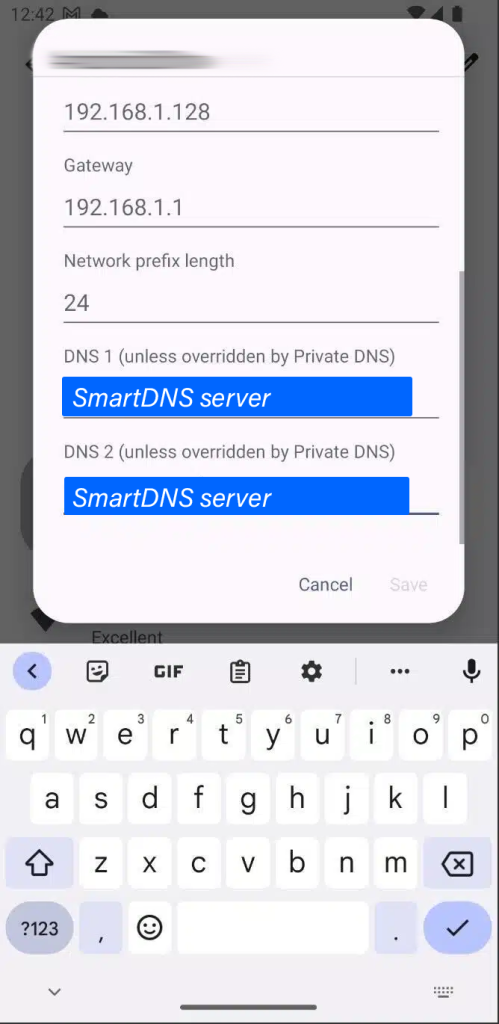
You will need to enter the following:
a) Keep the IP address and Gateway as the default
b) Enter the IP addresses of our Smart DNS servers (you will find them under the Control Panel on our website) in the Preferred and Alternate DNS server fields respectively:
Step 6
Finally, click the “Save” button to save your changes and restart your Android device.
You’re done! Here you will find what sites and media channels are unlocked via SmartDNS.

