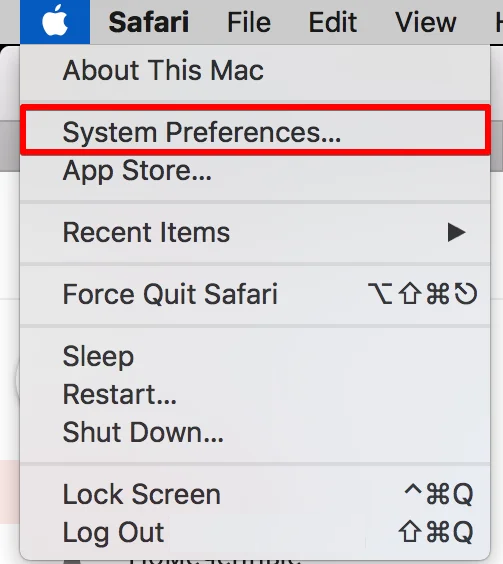
Step 1
First, click on the Apple Menu and choose “System Preferences”.
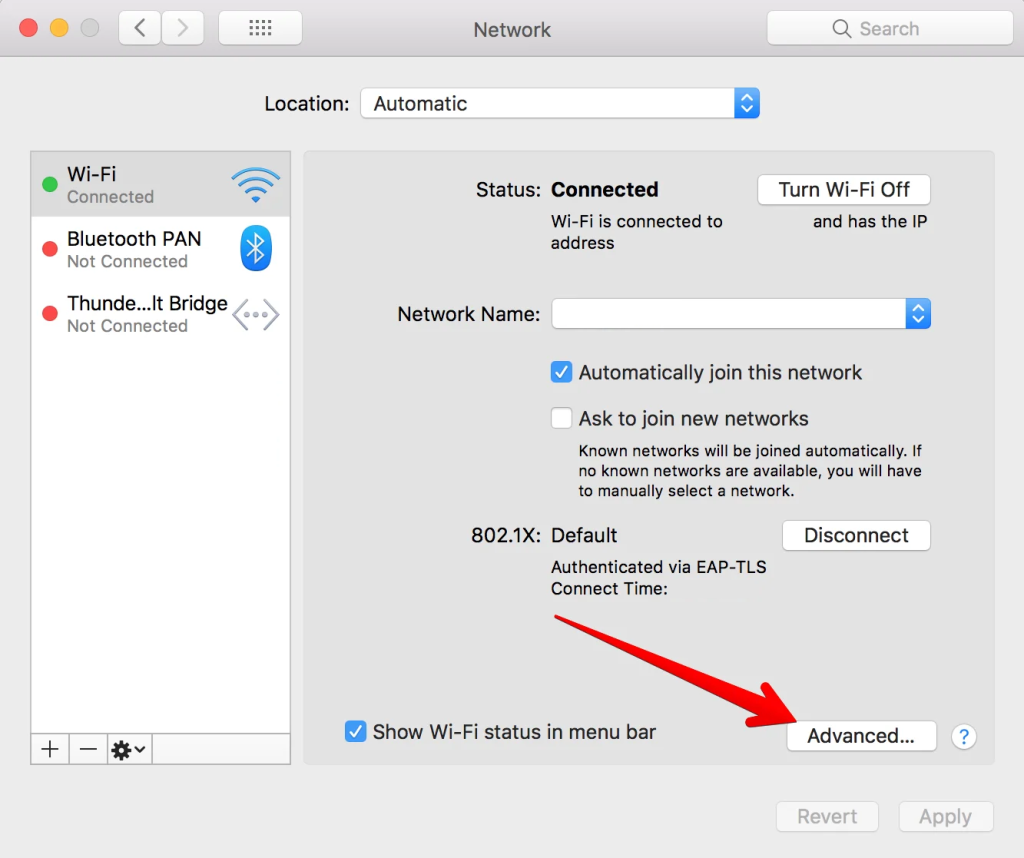
Step 2
Then click on “Network”.

Step 3
Now you should select either Wi-Fi or Ethernet your iMac device is connected to and click on the “Advanced” button on the lower right side of the screen.
Note: The network you are connected to normally has a green icon beside it.
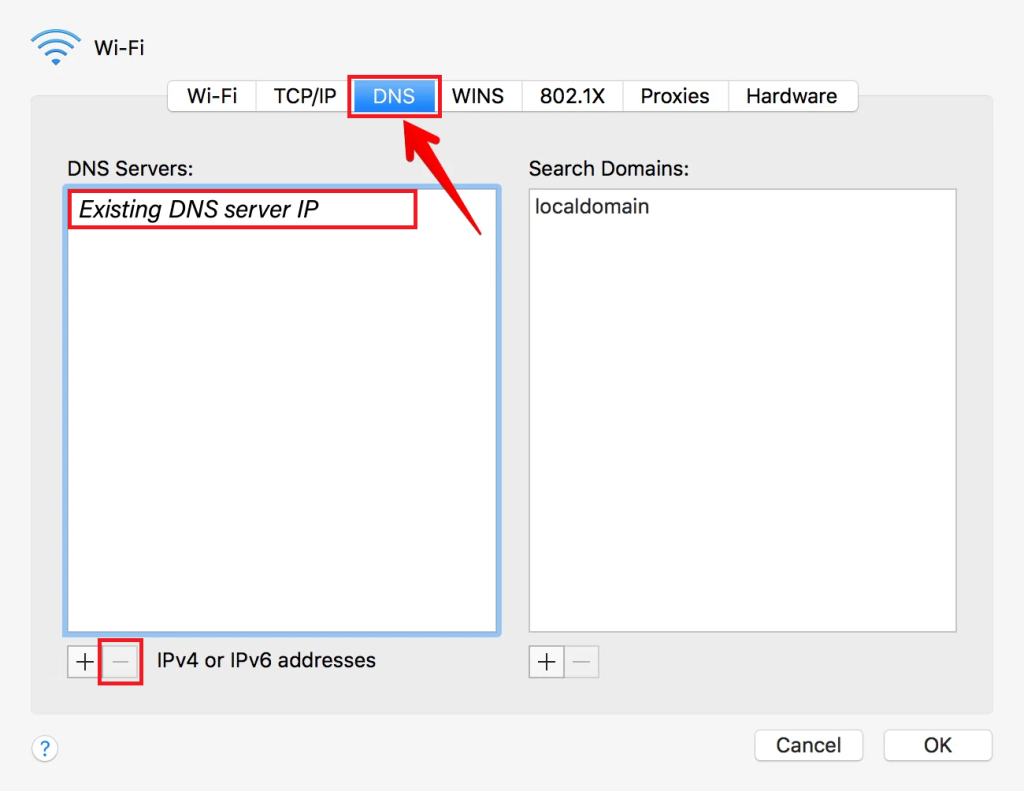
Step 4
Now you should choose “DNS” tab on the upper section, then click on the existing DNS Server IP and remove it via the ➖
Note: You will be able to remove our SmartDNS IPs from your iMac in the same way later.
Step 5
Then click on the ➕ button and add our SmartDNS IP address. Click on the ➕ button one more time to add the second DNS IP:
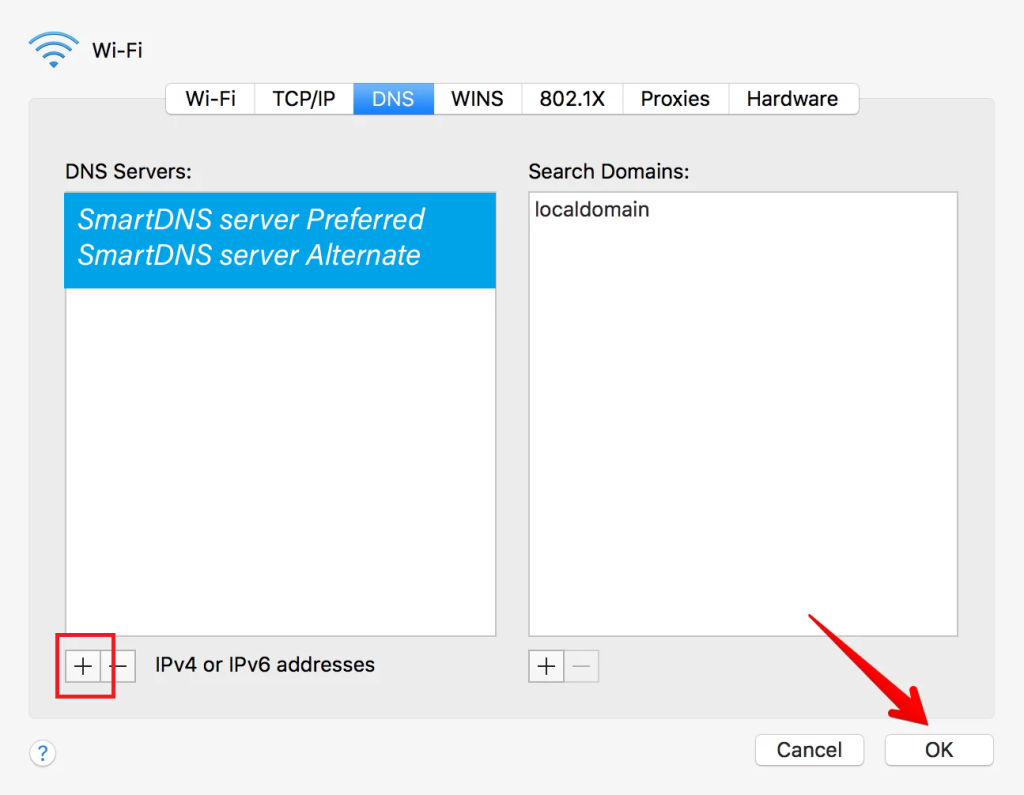
Step 6
Finally, click the “OK” button to save your changes.
Restart your computer.
You’re done! Here you will find what sites and media channels are unlocked via SmartDNS.