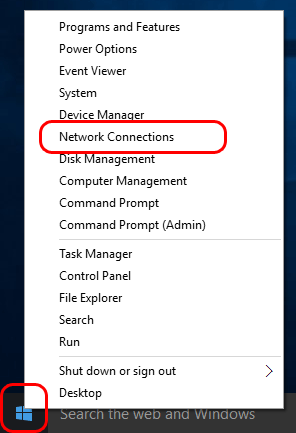
Requirements

To set up the Smart DNS you will need:

  1. 1. A SmartDNS account. If you are not a current subscriber sign up here.
  2. 2. Your DNS addresses. You can find them under the Control panel on our website.

Note:

To unblock streaming services with our SmartDNS service, you have to register your IP address. Check out how to update your IP address under the Control Panel here.

Step 1

Right-click the Windows Start button (lower left corner of Windows desktop), and select “Network Connections”:
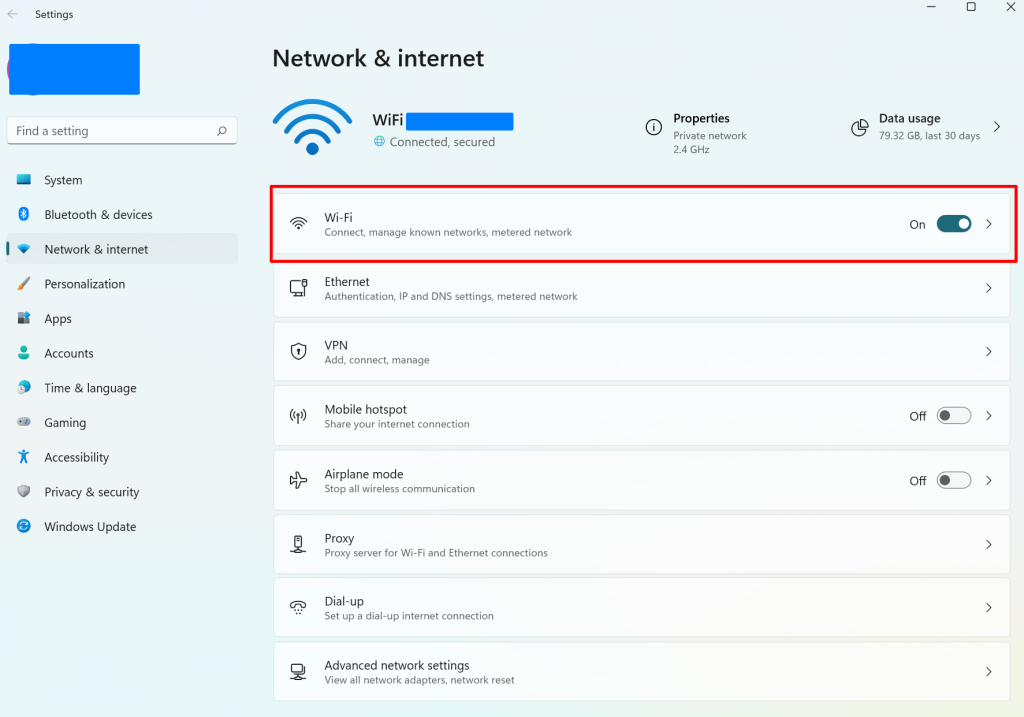
Windows 11 SmartDNS setup guide


Step 2

Click on “Wi-Fi” if you are on Wi-Fi or “Ethernet” in the case you use cable connection.
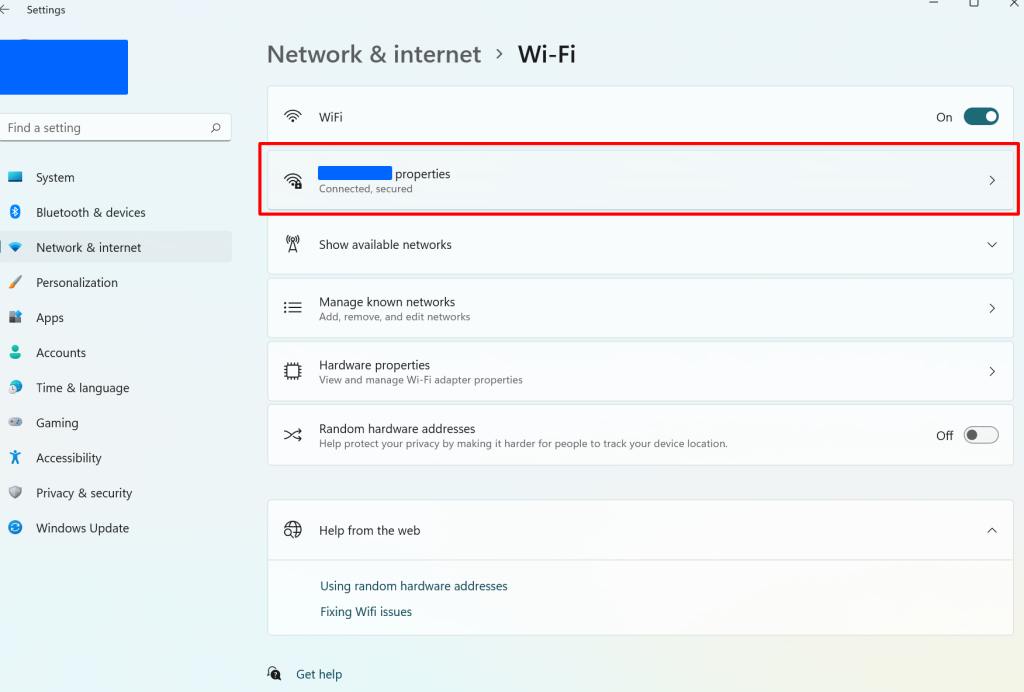
Windows 11 SmartDNS setup guide


Step 3

Click on active Wi-Fi connection.
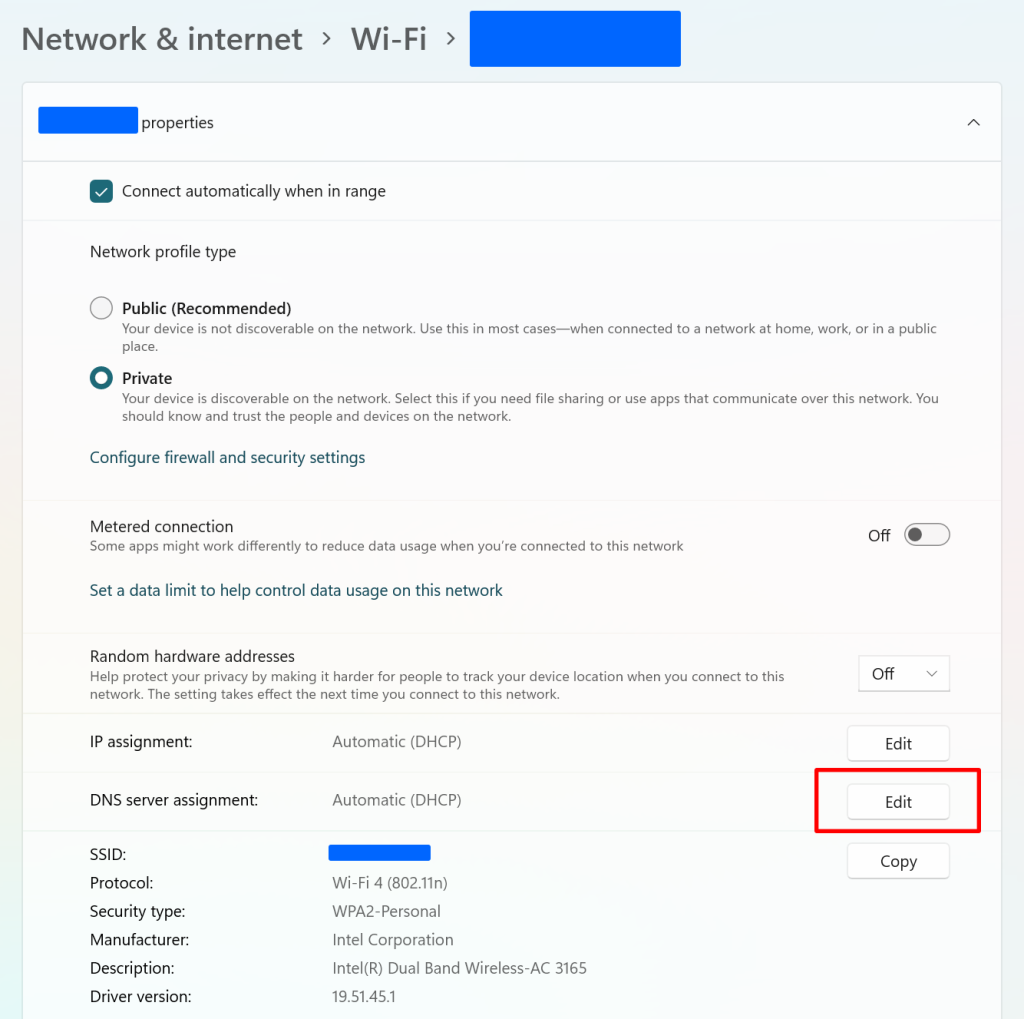
Windows 11 SmartDNS setup guide


Step 4

Under “DNS server assignment” field click on “Edit” button:

Windows 11 SmartDNS setup guide


Step 5

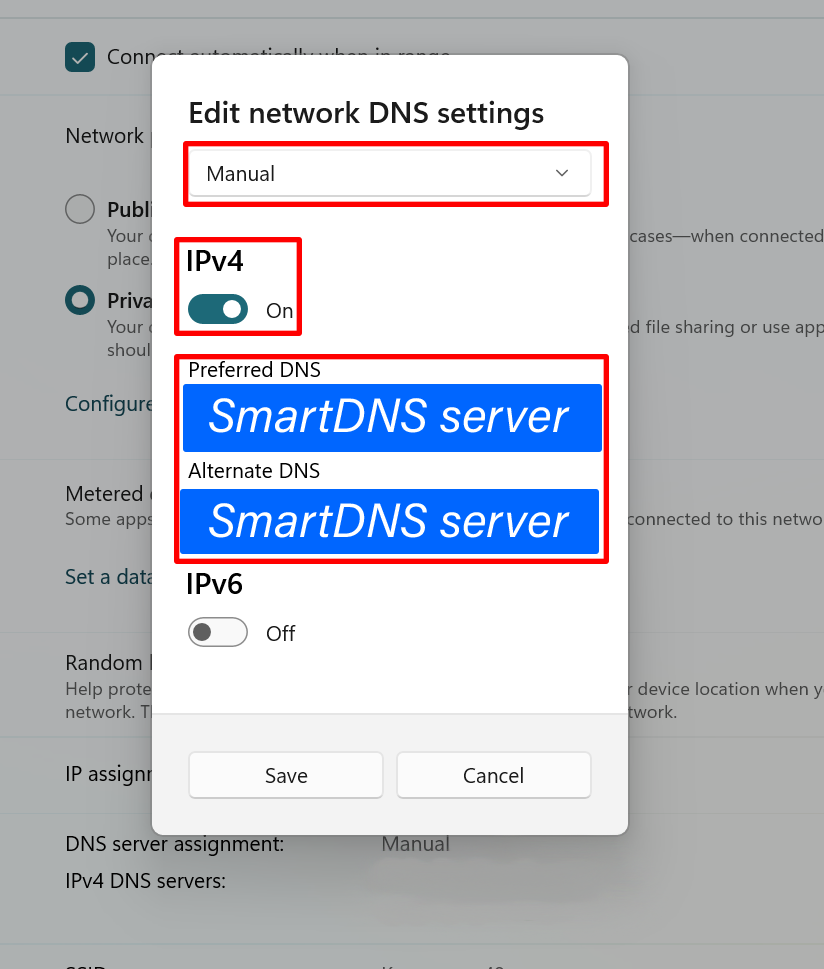
Choose “Manual” . switch on the IPv4 option and enter the IP addresses of our Smart DNS servers (you will find them under the Control Panel on our website) in the Preferred and Alternate DNS server fields respectively:

Windows 11 SmartDNS setup guide


Step 6

Finally, click the “Save” button to save your changes.

Restart your computer.


You’re done! Here you will find what sites and media channels are unlocked via SmartDNS.

CONTACT US

Have Any Questions?

Professional technical and sales support. We are here 24/7.
Open a ticket or contact us via Live Chat and get instant support.

SmartDNS help

Don’t have an account?

Sign up with the button below to get one day Free Trial account